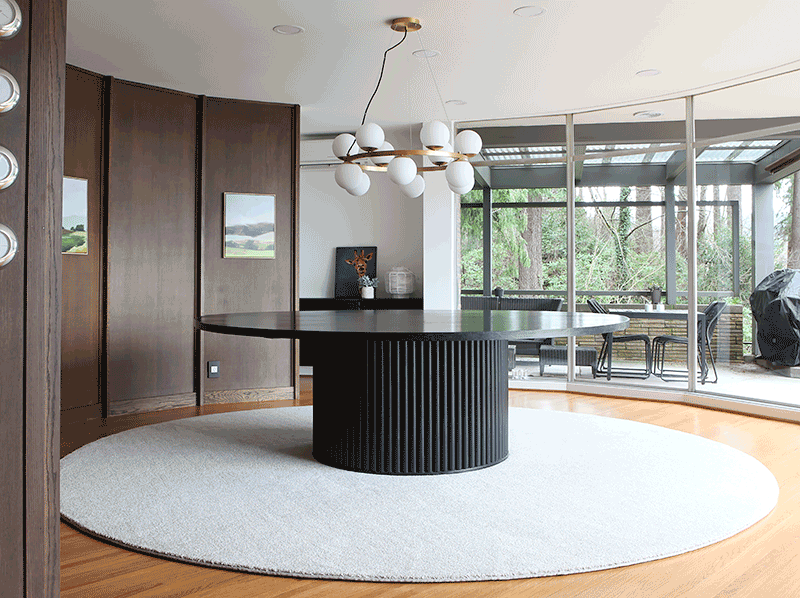
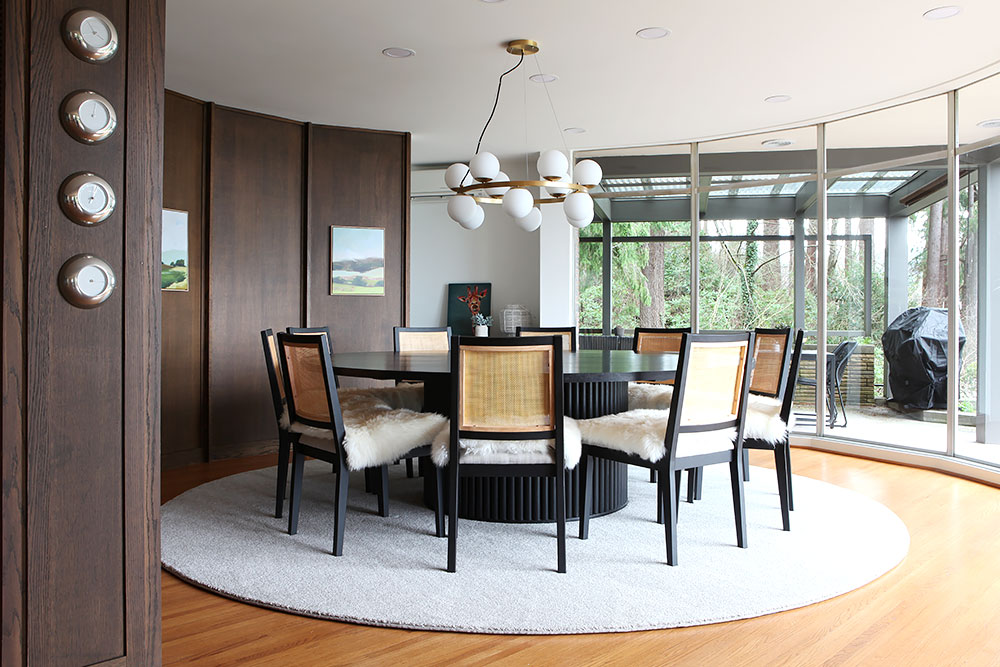
Round scalloped fluted pedestal dining table DIY - seats 10-12 people - Black Ink oak finish
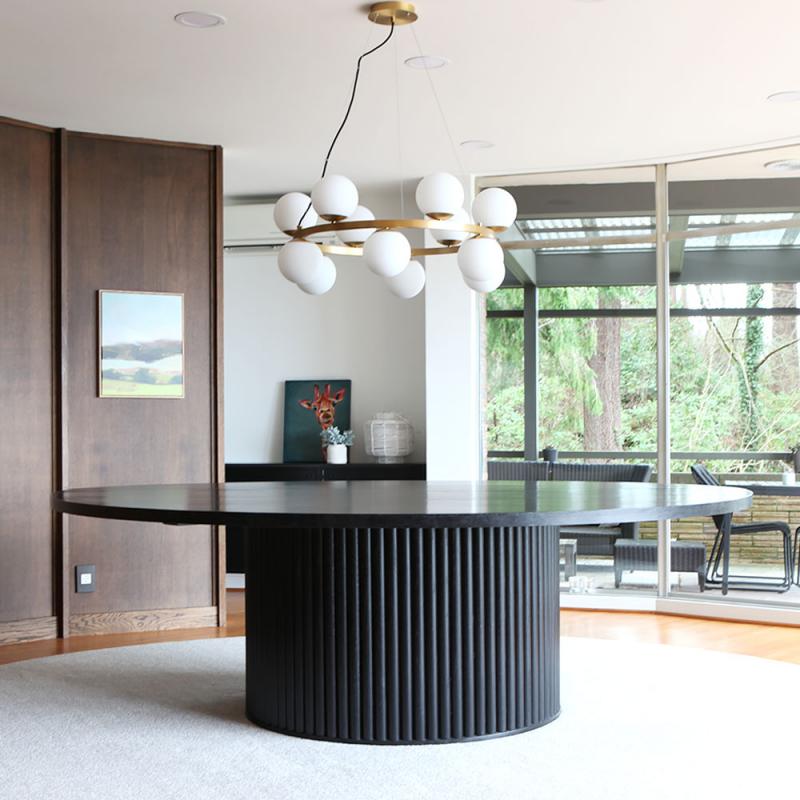
Right before last Christmas, we built our new oak dining table. We had lived here 4 years by then and up until then we had used a sheet of plywood on two saw horses. It was great because we could host parties for many people, but it was not the most comfortable table, nor very beautiful. When we originally toured our home before buying it, we saw that the original owners had a large beautiful round black table and it fit so perfectly in this round dining room. It was a large table at 7.5 feet in diameter (2.25 meter), so I knew it would not be something we could just go out and buy in a regular store.
And going through a custom design store would be cha-ching amount of dollars. Also not happening.
We immediately loved the idea of a pedestal table so no one would have to contend with a table leg no matter where they sat. And we knew that we wanted an oak table and that it should be black with a visible grain like the original table.
This posed the question: what type of table base can we make that:
- is structurally sound and sturdy enough to hold a heavy top
- has good proportion and scale
- Interesting design
- Can be built with the types of tools and skills we actually posses
- The materials are available, in existence (no mystery products) and in our budget.
For a while I was thinking about this type of pedestal, but it is pretty difficult to accomplish without some extraordinary math and kerf cutting skills. For a while we considered making the pedestal 8 or 10 sided which was something that we could accomplish, but that design did not excite me. Then one day a couple of years ago, I was researching laminate countertops because they have come back in a major way in Denmark lately and I came upon one of those bullnose fronts you can put on the front of a laminate countertop (although not back in style in Denmark). And it came in oak. It also briefly led me down a path of tambour appliance garage roll front doors, but I abandoned that idea because it comes with a fabric type backing and it was a bit costly an not readily available in the sizes that made sense for our project.
So in the end we bought a bunch of these bull nose trim pieces and had them delivered. Each stick comes 8 ft long so we could get 3 lengths out of each.
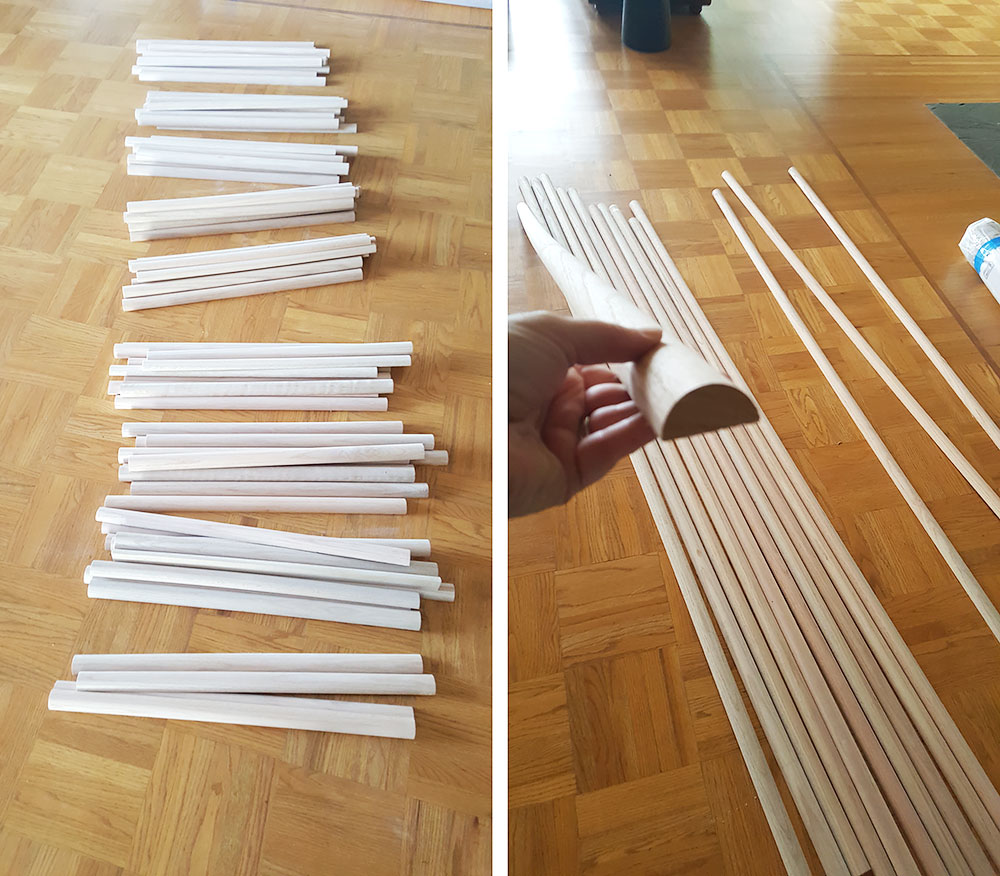
We cut all the bull nose trim to size and sanded them. Then we came up with this construction to not only attach the trim, but more importantly something sturdy that could hold the weight of the table top. Frank did some type of math to figure out how the weight distribution would work when considering the width of the pedestal and the overhang of the table top and the leg room needed to be comfortable and of course the most important factor: esthetically pleasing proportions. It's form over function over here people. To a degree.
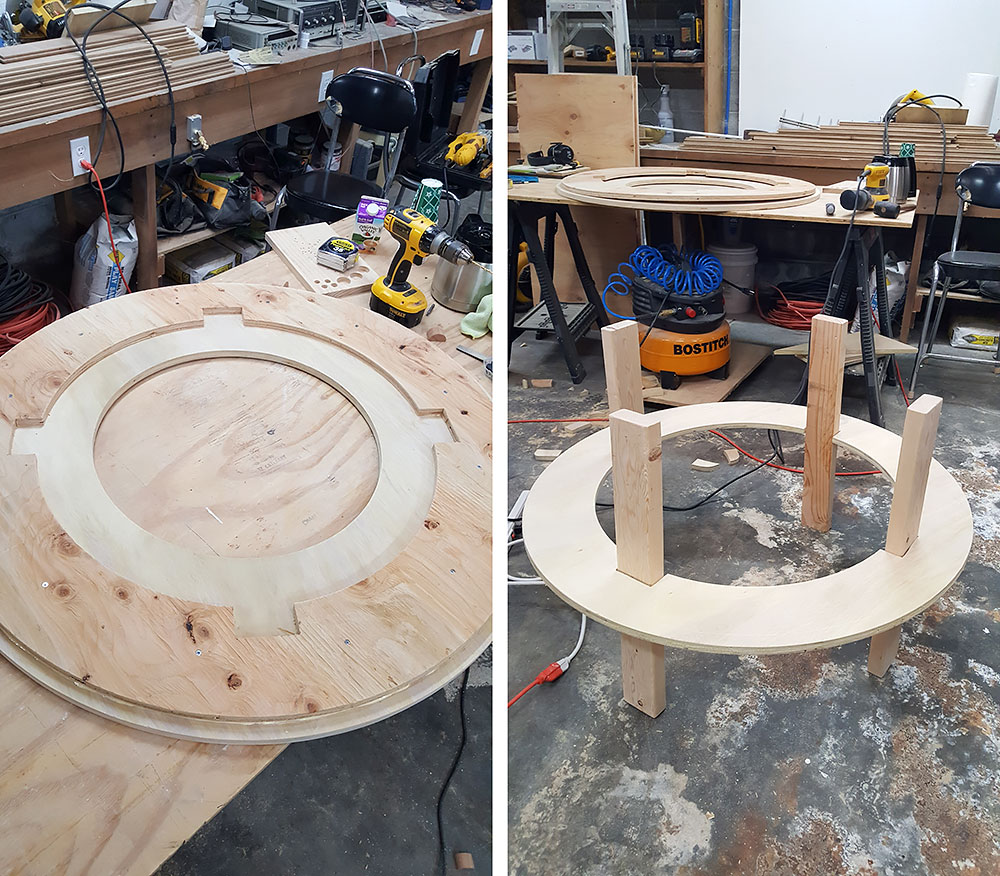
We cut out a bunch of circles out of plywood with a 1/4 inch home made plywood circle jig to make the shape and then made a 2x4 construction for the structure itself.
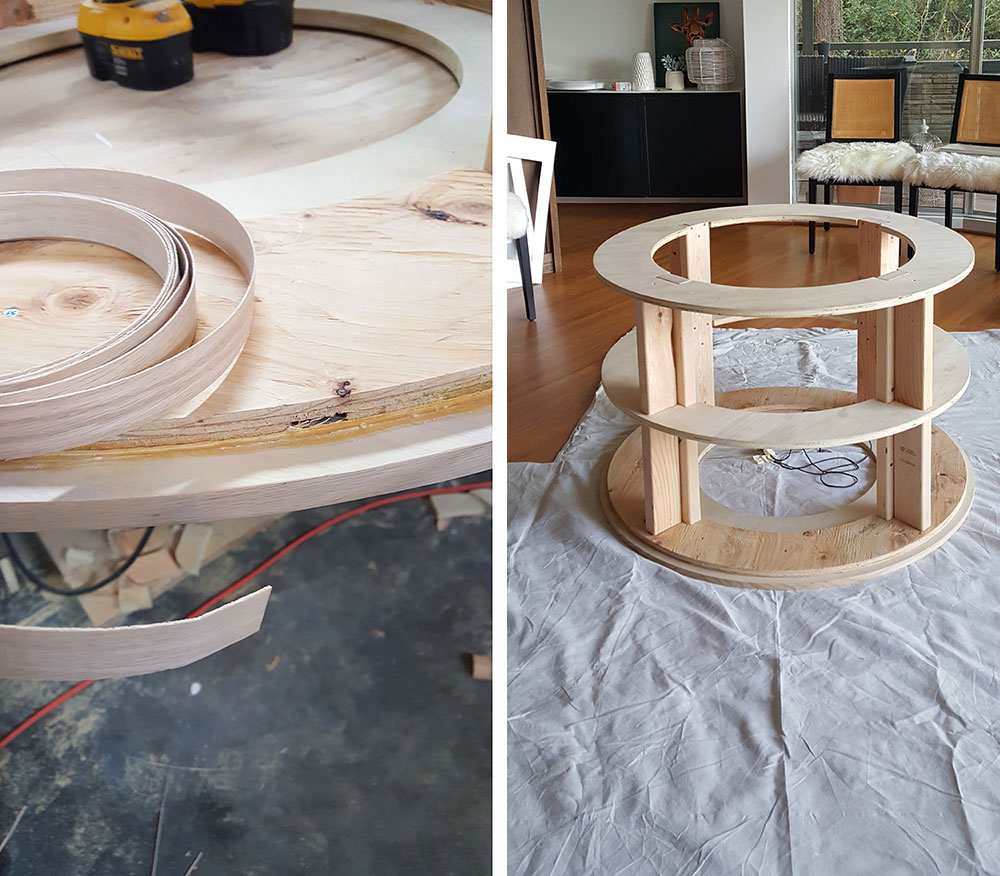
We decided to have an extra plywood ring on the bottom for the trim to butt into so we added some oak veneer to that sheet since it would be visible.
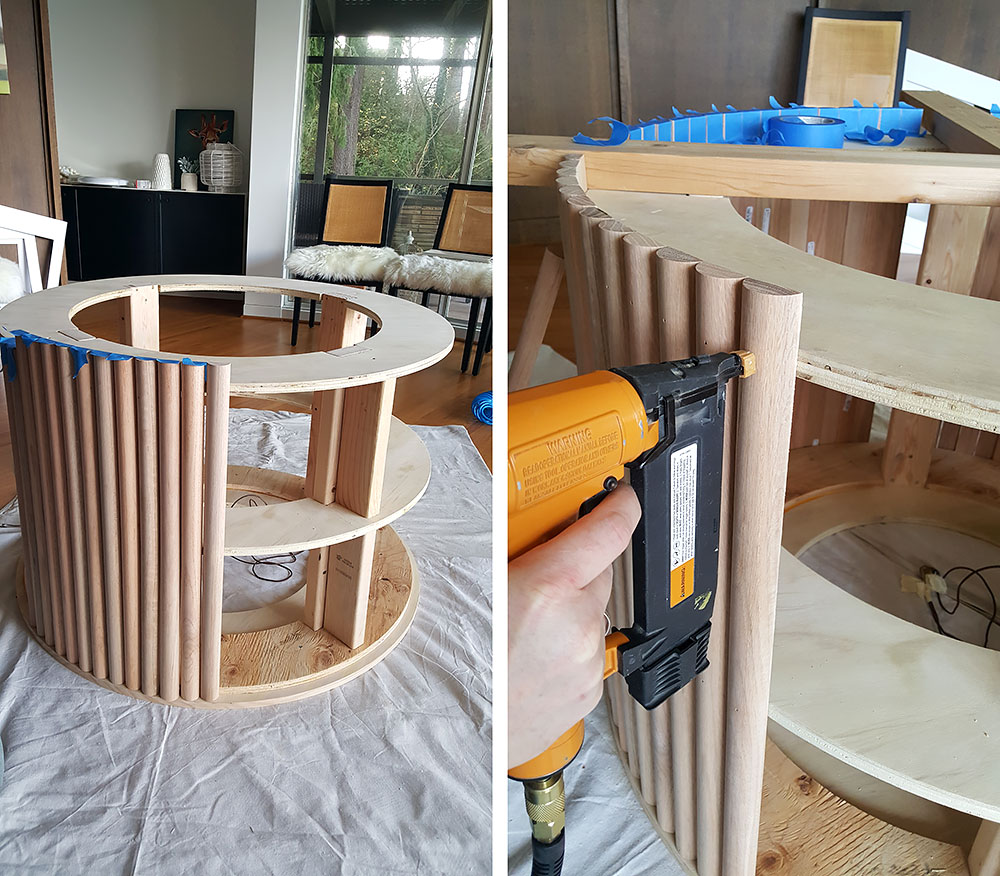
Then we attached all the bull nose pieces to the pedestal, periodically checking for plumb. And we taped up several pieces ahead of nailing so that by the time we got around the the last ones, we could finagle the width of the pieces to get a perfect fit without any one piece being noticeably narrower than any other. It was a bit of a puzzle and running back and forth to the table saw at the end, not gonna lie.
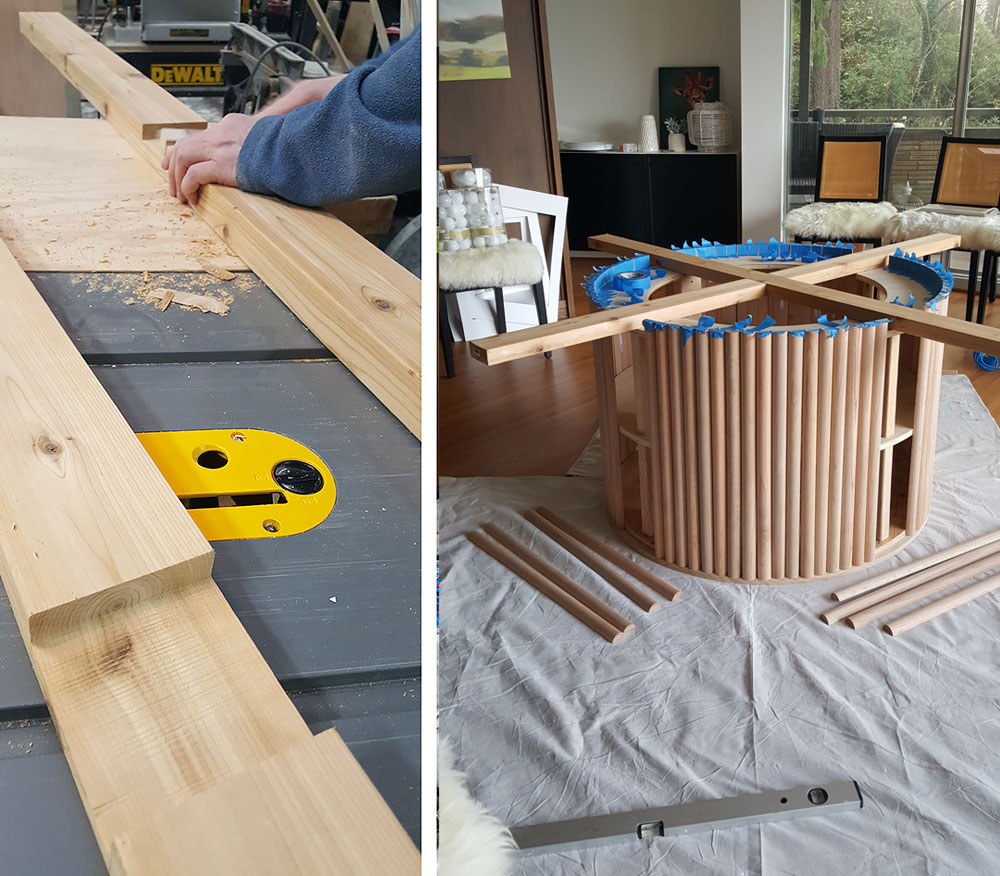
Frank made a cross brace situation with a half lap connection in the middle to secure the top onto.

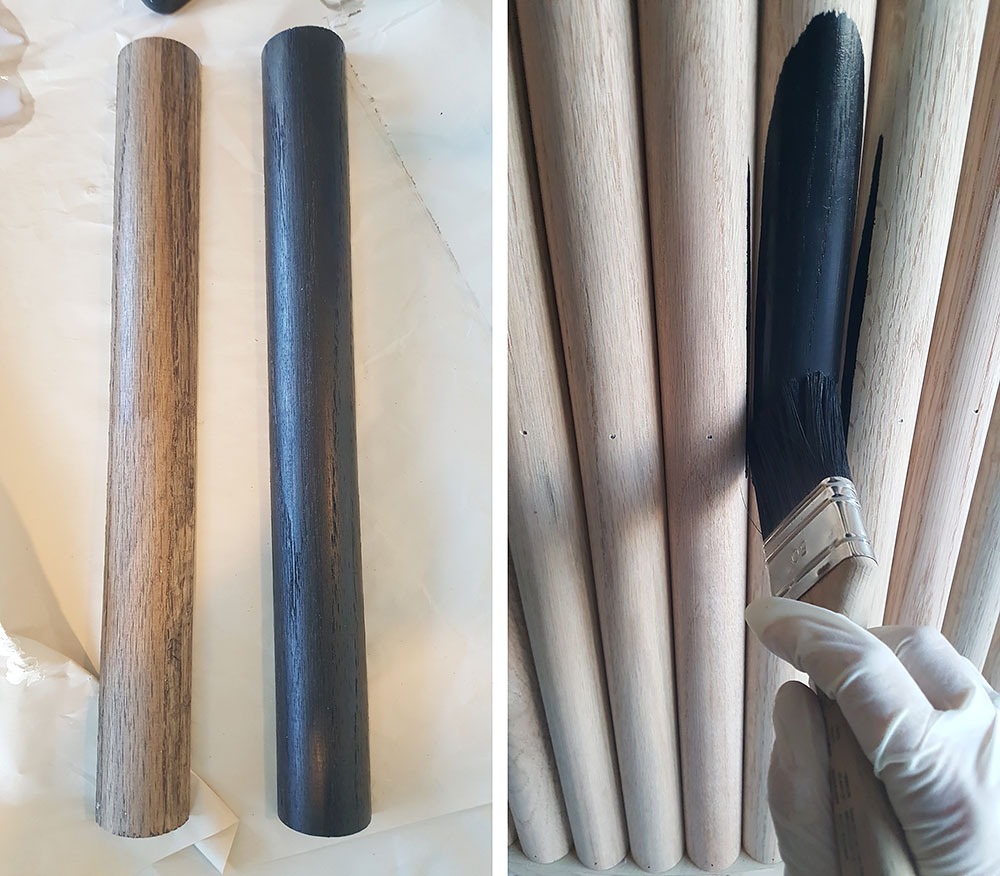
I then painted the base with this ink. I made a test to see if i wanted the ink diluted - on the left - but went with the ink at full saturation - on the right.
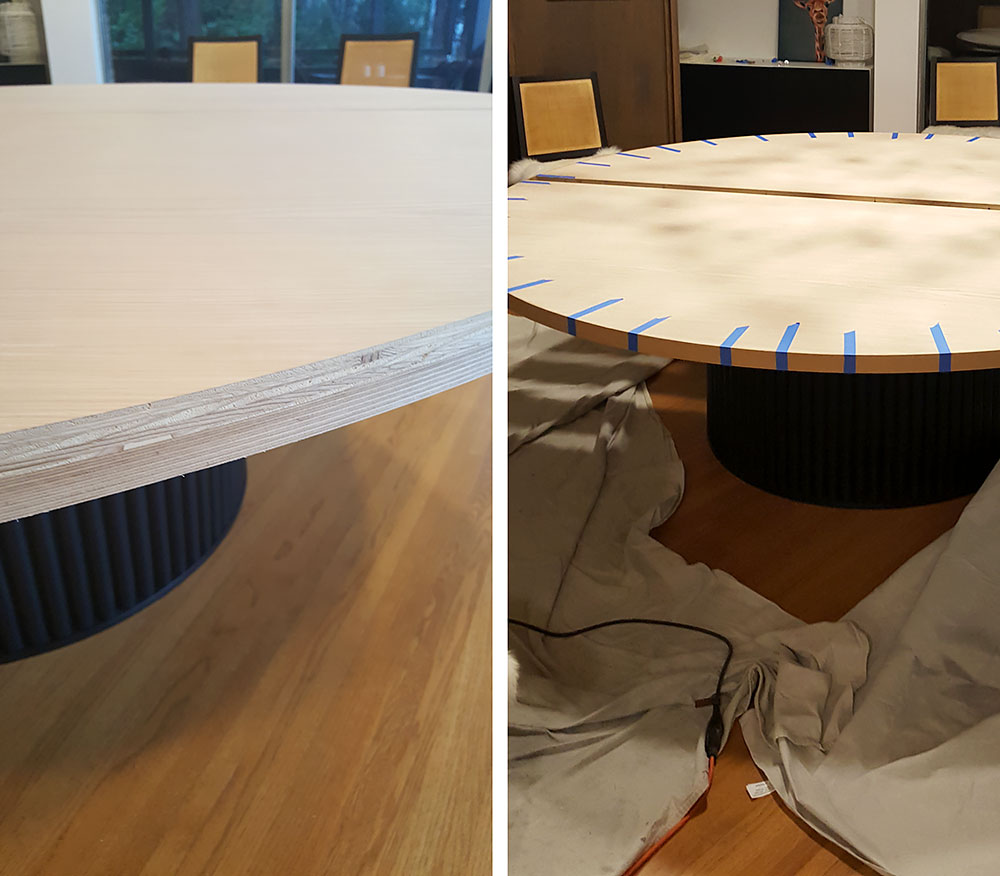
I went to our local hardwood supplier and picked out the most beautiful 3/4 inch rift white oak sheets of plywood for the top and and some Baltic birch plywood to be glued to it for the bottom of the table top. Because of the size of the table top we needed to make it in two halves. Also, you know, to be able to get it through the door. Table top: 7' 6", Door height: 6' 8". And stuff.
The hardwood store delivered the plywood sheets to a nearby woodshop, who CNC'ed the half circles and glued them together for us, oak on the top and birch on the bottom. After they were cut, the semi circles fit into my minivan and I picked them up. Gosh they were heavy.

We installed these metal aligners (similar) to each half of the table top and used this dowel jig to drill for them.
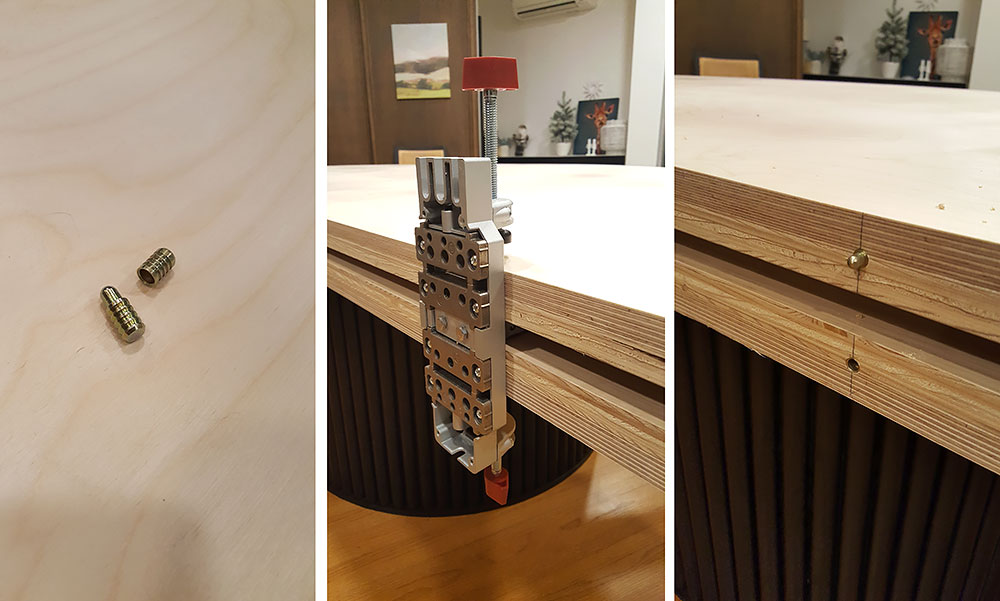
And then to secure everything in place we used bolts with these nuts. The nuts get inserted into the parts and then you can take the table apart if you need to without damaging the wood.

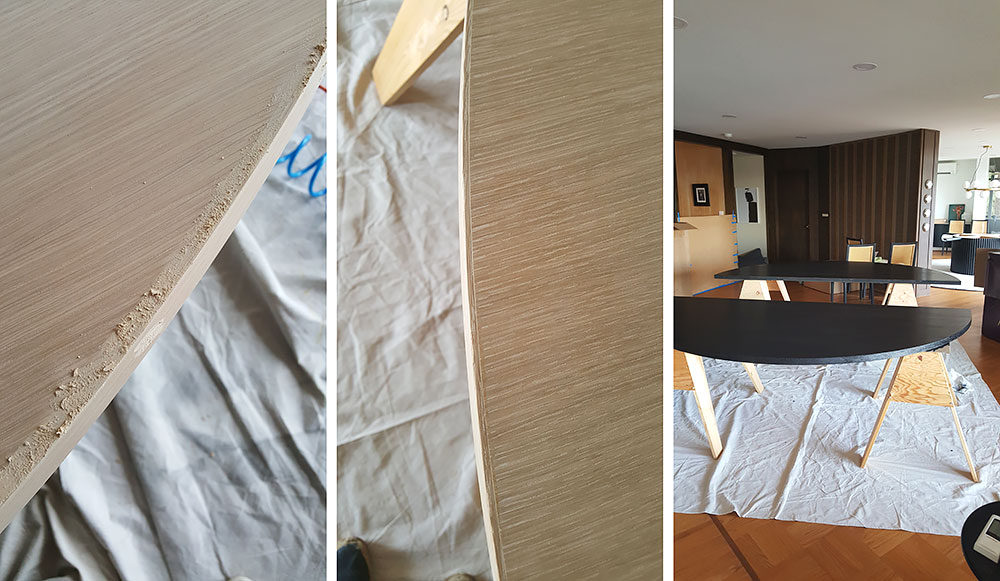
I bought a 12 ft 2x4 in white oak from my local hardwood shop and Frank sliced off 2 1/8th long sliver on the table saw which we then glued and taped to the sanded edge of the table. We cut them to size and sanded them flush with the tabletop.
We filled the edge with wood filler and sanded it. Then painted the table top with 5 coats of ink and 4 coats of satin varnish. The ink went on really uniformly and nice and was very easy to apply. I will definitely use this in an upcoming project or two. The varnish was also really nice to work with. Something I have since learned is to do the first coats with semi gloss or even gloss and then only the last one or two coats in the satin. This is because the satin formula has a little bit of a whiteness to it that does dry clear, but with many layers you could risk a build up that would make it noticeable. The gloss one does not have that, so you can build up with that and then finish up with only one or two coats of satin.
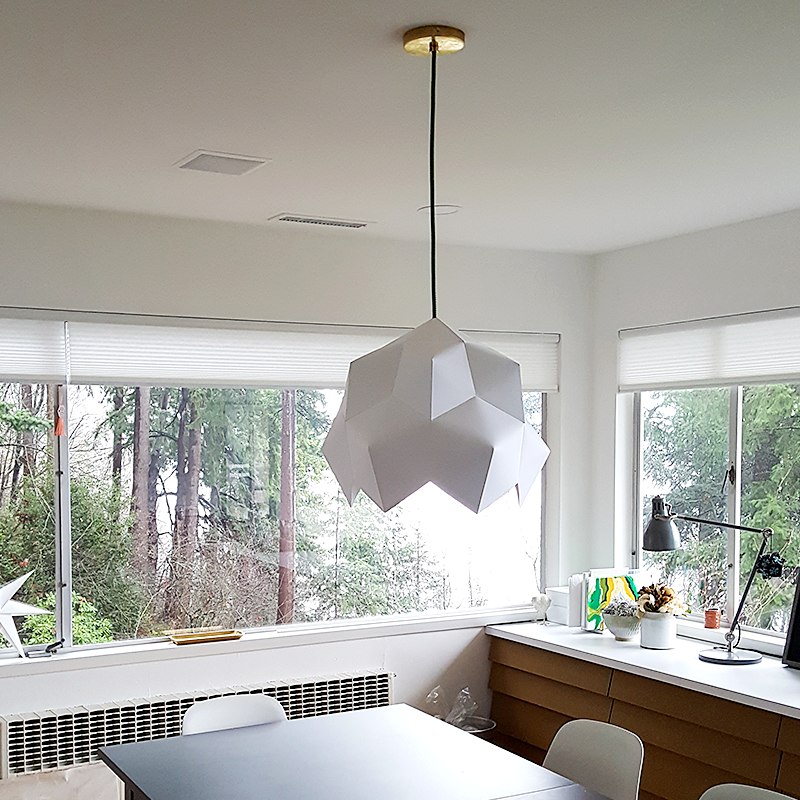
After scouring the net for a 12 ft circle rug and coming up empty handed for anything under 4 grand, I instead bought a piece of gray carpet at a discount carpet store and had it cut into a circle and edge banded. I have cats and I need to not cry over a crazy price tag if you know what I mean. We hung this chandelier over the table.
I bought this and this artwork and made frames out of corner molding.
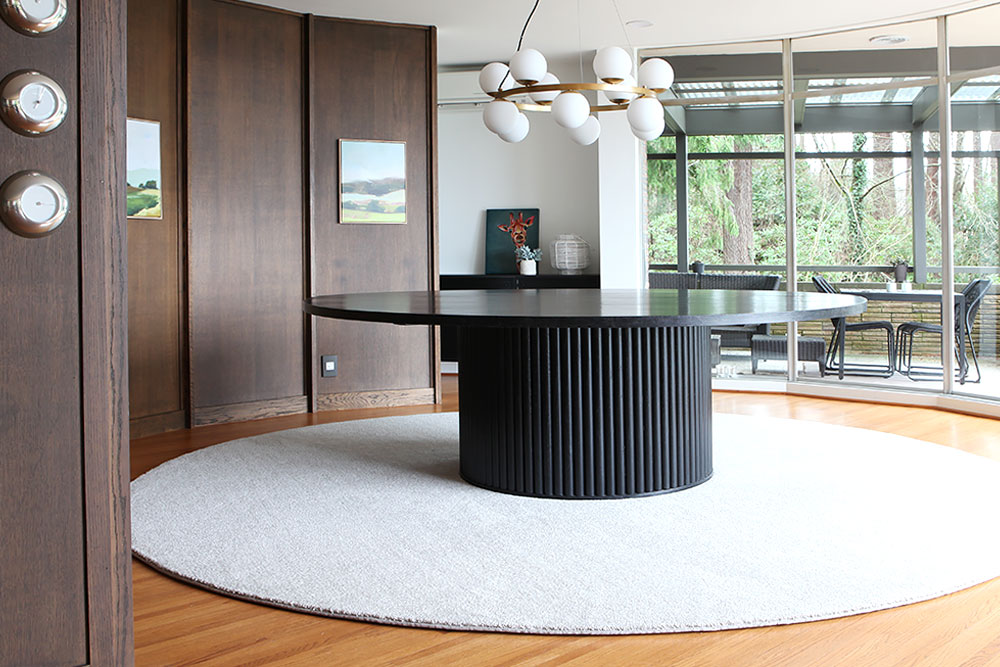
I got these Studio McGee chairs for the table and put these sheepskin covers on top for that Viking feel - also great solution for cats. This is a gif and you have to go to the website probably to see it work, but it's worth it:
This was not a 10 dollar DIY by any means, nor a beginner project, but it was probably half or a third of what it would have been to get a table made because of the size. Most importantly it is hand made and home made which are two of my favorite things.
I am a Danish American decorating life in Seattle. I love all things design and DIY.
I can’t think of anything more fun than coming up with project, making it, photographing it and sharing it with you on my websites.
I am a Graphic Artist, a remodeller and home maker by day.
AHomeForDesign.com AHomeForCrafts.com AHomeForFood.com My Portfolio